Thursday 28 February 2013

First make from craft club tonight....

It was lovely to enjoy some great company tonight...

It was lovely to make new friends and bring different fabulous crafty ladies together...

It was lovely for  me to make something with company round my table!!

So, here's the first of my mother's day makes....

The amazing stamp is from the elegant Anna Griffin. I stamped with archival green and then watercoloured with reds and yellows. Not sure the photo picks it up, but the rose is glittered with ultra fine glitter.

 
The cage die cut is from Xcut range and is superb. TIP: Ink up the die while it's still in the metal cutting frame. It leaves a little border all the way round.
 
After that I've added in some glitter letters and fabric flowers. The pretty backing paper is also Anna Griffin. The only people who stock her beautiful products in the UK is QVC. Which is unfortunate as I hate their awful P&P charges, :-(
 
www.annagriffin.com  Check out Anna's website for some wonderful makes and inspiration!
 
 
How's your mother's day cards coming? Share what you're up too :-)
 
Watch out for tomorrow night as I'll be posting my first make for the new design team I'm on: Card crafter's circle!!!
 
I'm off to 'Make it' at Farnborough tomorrow - I can already feel my purse itching :-)
 
night all xx


Tuesday 26 February 2013

Exciting news for me....

Hi everyone ;-)

hope your week is going really well. Don't know about you, but I've definitely had enough of winter now!

Bring on the daffodils and primroses please :-)

Until then I'll be using the dark nights to colour in....

Because I've joined a fabulous challenge blog as part of their design team!!

Cardcraferscircle
www.cardcrafterscircle.blogspot.com


I'm already working on my first projects which are from a lovely illustrator's digistamping website.
I'll be posting my projects on here each Friday evening with the link to the blog so you can play in our challenges.
And it's not just me (of course), I'm part of a wonderful team of crafty gals who'll be giving you lots of ideas and inspiration.

Signing off now as need to go play with some paints!!

Nite everyone xx

Sunday 24 February 2013

Phew....

Just finished by docrafts magazine commision for the May edition :-) I'll find out if I can give you any sort of sneaky peak (you never know). Won't risk it now incase I get hit by a flying 'brad' from docrafts magazine chief :-)

All I will say is forget soft and subtle, this collection is bold, colourful and great fun to play with :-)

I've also got some fab news to share this week!! It should mean a few more friends come and play on my blog :-) And wonderfully for me, I'm about to make some good friends too :-)

Have a good week everyone xx

Friday 22 February 2013

It's official....

Sorry I've not posted in a little while. I've taken a week out to concentrate on my best job - mummy! My hubby and I took our little monkeys to stay in Lyme Regis and the weather was really kind.

Not just that, I celebrated my birthday with Daniel Craig!! (ok, yes he was on the dvd but still, a lovely birthday pressie as Skyfall is brilliant!) and accompanying Daniel was a 12 year old single malt (yum, yum!) My hubby knows me sooo well!!

Anyway, back to the official bit :-) 

The 'Tayberrys Craft Club' is up and running and my first club meeting is next Thursday! We're going to be meeting fortnightly and creating all sorts of crafting mayhem and fun (watch out for photo's...)

I've been lucky enough to meet some lovely ladies through my docrafts demo'ing and thought it would be great to get to know them more.

Just another part of my crafting journey, and you know what they say.... it's more fun with friends!

Friday 15 February 2013

Piece of cake Nanny....?

Quick make tonight as just realised I hadn't made a card from the kids to their nanny!!

Had made the main one though :-) (phew!)


Main feature is the lovely Lucy Cromwell docrafts collection. Throw on some flowers and little letters (wish more craft companies would do paper letters not just sticky on ones!)


Have a great weekend everyone... x

Thursday 14 February 2013

Grab a £10 voucher for Crafters Companion today only!

One of my favourite suppliers, Crafters Companion (do you have the Ultimate Pro?) is offering £10 off voucher just for Valentine's Day!!

If you've not already 'liked' them on facebook then go find them and grab your voucher :-)

I've just picked up the rest of my pen sets in the Spectrum Noir range - here comes some colouring in!!

If you do grab something, share what you nabbed and then more importantly, what you make with it... x


Wednesday 13 February 2013

Vintage postcard for the guys....

Evening everyone, hope you're all good on the night before we do some extra snogging all in the name of 'St. Valentine' :-)

Thinking about the men folk in our lives, I've just made this little number for a good friend....


Materials are from docrafts 'chronology' range - Soooooo loving the metal ware on this range!!


Embossing folder from this set is bloomin fab and don't just think about it for men. I'm going to have a go using it on a wedding card... so watch this space :-)


If you're a big embossing folder fan, then head over to my pal Jo Austin's fab blog so see embossing and die cutting in action :-)  The more ideas we can give you the more fun we hope you have with your stash.... x
www.craftychitchat.blogspot.co.uk

Speak soon xx


Tuesday 12 February 2013

Say it with flowers....

Sorry, been away for a few days as needed to concentrate on the job that pays the mortgage :-)

Also, had a rare and lovely family day on Sunday which ended with my little lad and I paying a visit ot A&E because he didn't look where he was going and bopped into a metal frame and cut his eyelid.

Luckily are local hospital are superb and we were out in a few hours - he's much better now. Just another little scar for him though :-(

Anyway, back to the crafting :-)

Here's one I've made tonight as a commission from a friend for their mum's birthday.

My brief was flowers and butterflies....


The beautiful birdcage is a Xcut die and I've cut it out of docrafts new felt bundle.
Butterflies are docrafts and you get loads on a die cut sheet for £1 !!!
Large flowers are stamps I've got in my stash. Just stamped them onto free patterned paper I got in one of my Simply Homemade magazine editions (love this mag..)
Heart is from Nitwits range
Leaf is a Woodware punch
Little flowers all come from Woodware hydrangea punch
Used Martha Stewart doily border punch

All the gems are docrafts....

I deliver this tomorrow - hope it's well received :-)

Happy crafting til next time all xx

Friday 8 February 2013

Demo day tomorrow...

So, kiddies are all tucked up and looking seriously cute! One under Fireman Sam duvet and the other under Disney Princesses :-)

Now time to pack my little crafty bag (docrafts craft tote is really handy!). For tomorrow I play, teach and create some fab things (what a tough job....)

I'm at The Range in Aldershot Hampshire. Here's what we're playing with:

Chronology
Spots & Stripes
Vintage Notes

I know you're not really meant to have a favourite- which obviously I don't (but then again, if you were to push me - it would be vintage notes!)

Whatever your Saturday is about - enjoy it. And as someone pretty cool once said -

'Don't just live the length of your life - live the width too'

Thursday 7 February 2013

Who I'm following on facebook...

So, who are you stalking? (in a crafty way I mean - although Danny from The Script is always a welcome photo on my facebook each day!)

Sorry, had to snap out of a day dream!!

There's loads of great crafters out there who post their creations quite regularly. (My craft page is 'Tayberry Crafts')

Also, if you pick up on one of the crafting companies they have brill facebook giveaways - just look for Hunkydory's or Crafters Companion pages. docrafts have a fab page where crafters post photo's of their creations aswell as news and info from docrafts towers :-)

Here's some other people to nose for:

Jo Docrafts Austin
Becky Dryer
Katy Godbeer
Leonie Pujol
Stephanie Weightman
Tim Holtz
We r memory keepers

Have fun nosing at what's out there in the big crafty world - and who knows... you just might win something while you do it :-)

Happy 60th...

Today's going to be about sharing (rather than teaching) - hope that's ok :-)

I was commissioned to make a 60th card for a lovely lady who loves all things 'vintage'.

I love this style, (can you tell it's my favourite!)

Out comes Joanna Sheen's ATC Assistant CD rom, lots of Tim Holtz distress inks and pearls and here you go...


Tuesday 5 February 2013

Quilt some love...

Don't know about you, but there's something wonderfully homely about a hand-made quilt.

Well, as much as I'd love the hours this amazing skill requires - my kids rarely let me have it so the most I could probably manage is a pot holder!!

I think crafters are great at swopping their skills (well it's stealing really, just that we're polite about it!). Here's a card using the 9 square model quilters use. The hearts in each corner make it a bit more fun.
The faux stitching and borders are done with the brill Sakura Jelly Roll pen - if you don't own one then go get one (you'll wonder what you did without it!) It meant I could hand draw the vine leaf borders around the edge (add a little bit of clear gloss in each leaf to finish it off)


There's lots more you could add to this card - to be honest sometimes I like something classic :-)

Monday 4 February 2013

Beat the Postman....

Ok so I don't mean literally (no matter how much they bash your lovely new craft stash when trying to get it through your letter box!)

I'm thinking how we get around the horrid 90p large stamp cost (booo!)

You got to get up early to beat us crafters as we have a very cool weapon in the fight against big stamps....

DIGITAL CRAFTING (Whoopee!)

I'm all about this today as it's my step-mum's birthday this week. And despite my pleas for them not to retire outside of a 5 mile radius of us and kids (babysitting is a necessity for me and hubby to retain out mental health!!) - anyway, they went and moved to Devon!

I'm not the kind of person to hold it against them so here's two cards (because we're nice like that in our house) made using digi crafting. It's quick and there's soooo much to choose from. Go on, have a play :-)


WELLINGTON

The cute bear if you've not seen him before is Wellington. Apparantly some horrid kids left him in attic and some lovely new kids found him and brought him downstairs (how sweet?) If that happened in our house, he'd now be covered in jam and dog hair :-)


TULIP AND FRIENDS (and others too)


My step-mum loves little dogs so this character from 'Tulip and Friends' DVD rom was a great choice for her :-)
And unlike our dog, it doesn't shed any hair!!

Sunday 3 February 2013

Frame it...

Hello!

Thought we'd play with something you can use on cards, gift boxes or tags. Once you've put this together once, you'll get hooked as you'll want to put all sorts in the frame. Think about sticking down a piece of acetate and you can make a shaker frame :-)


The frame we're going to make here you can get your hands on two different ways:

Docrafts Digital Designer DVD Rom (anyone of them). When you select 'create' option for a new project, scroll down until you find box card. Click on this and then layer over any paper you want. It will only print out the box so there's no wasted paper left (how clever!!).

Docrafts brought this out as a plastic template in their 'Create your own' range. I've seen them around in craft shops. Here's the details: Papermania 3D Box card template (PMA 2692011).

Step 1: Cut your box frame out and score the lines as it says. When it comes to cutting out the frame, if you're using the printed version then cut inside the frame line. The solid frame outline looks nice and it's a lot easier to cut inside rather than follow exactly.

TOP TIP: Once you've done all your score lines, turn the card/paper over and score again. This will make folding much easier and won't tear your card on the fold lines.


Step 2: Folding. On the inside draw letters as below in the photo.


Step 3: Put double sided tape on top half of C. Fold C over B and stick together.


Step 4: Put double sided tape on D. Fold over and stick on top of E.


Note: *If you are going to do a shaker or you want to add acetate over the frame then do it now. Also, if you've a topper you want to show through the frame then stick it down now too.

Step 5: Fold the left side panel over the top of the front and stick the flap on the side down on top of this section.


Step 6: Fold bottom half up and use your flap and the cut you've already made to secure flap in place. I used glue on the panel to make sure it stayed together.

Now you're ready to add it to whatever project you're working on :-)


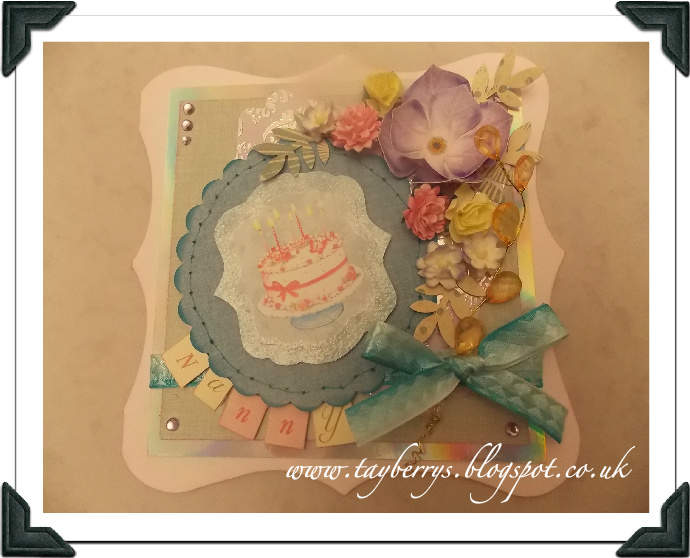
As you can see I've used this on a 'Just For You' card. The extra's used are:
  • Papermania Burleigh Blue paper range and co-ordinating ribbons
  • Vintage Notes buttons and big bloomers.
  • Sentiment is from Docrafts 'Portobello Road' DVD rom
  • Xcut Leaves 1 nesting dies
  • Papermania purple and pink ink pads
  • Docrafts felt bundle
  • Blue gems
  • Pink card stock
  • Ribbon
  1. Cover card base in pink, inking edges first.
  2. Use your pokey tool to make holes along all four edges of Burleigh Blue paper and stick down.
  3. Cut a border of complimentary Burleigh Blue paper and wrap ribbon around, securing at the back. Do the holes again and stick down.

 To make the flowers you see, cut different size circles from patterned paper and ink the edges. Secure four layers together with a brad first then crimp up the edges to make it 'flower' like.


 4. Stick the frame down to your card using silicon glue or 3D pads. Stick four buttons into the frame and finish with the sentiment stuck at either end with 3D foam pads.
5. Layer two Big Bloomer flower heads together. The blue ribbon was done by having two strips of ribbon , one smaller than other. For each strip, stick the ends together so you've got a ring. Flatten the ring and secure two together with PVA glue. Finish by sticking little Burleigh Blue ribbon in the centre. The flower has been stuck down with silicon glue.
6. Once your big flower is stuck down then arrange your little flowers either side and stick down.
7. Cut out two leaves from your felt stock, ink edges and secure to your card with silicon glue.
8. To finish, add little blue gems and ribbon on top corner of frame.

Let me know how you've got on with this one x

Saturday 2 February 2013

A place for little treasures...

So, not a card today....

Instead time for boxes and I'm giving you three different ideas :-) The colour scheme comes from Docrafts Creativity Club download - 'Paisley in maroon' (and it's lovely!!)


First on the left is a wedge box. I've made quite a wide one here and the great thing is you can pick the size you want. The only thing to remember is your overall length and width needs to be divisable by 2. So, this one measures 10''x6''.
Whatever your measurements. You score length in half across width of the card. Then mark with a little pencil line half way across the top and bottom. Then score between your mark line and outer edge of score line. It will look like three triangle sections on the top and bottom. Now fold in half and you'll see that the 'edges' slot together. Take a hole punch and punch through two sections on each side. Decorate the front however you'd like. Finally, thread and ribbon through to hold together (once you've put your little pressie inside!).


Next is a bonbon box. And this is really easy to make. All you do is score a nine box grid. And that means you are going to cut a square that's divisable by 3. So you can take a 12'' piece of card and have score lines at 4'' & 8'', turn and do the same. Or pick A4 card (which this one is) and score at 2.5'', 5'' and 7.5'' (discard remaining card). Turn card around and do the same.
Now, in each corner score a diagonal line from outside edge to inside edge. So, in the four outer squares of your nine box grid you'll end up with a diagonal score line.
Fold all your scores and decorate! To keep your box together, hole punch in each top corner and thread your ribbon through.

Lastly, this cute little bag is a Papermania template called 'Goody Bag'. Simply draw around the template, cut out and score along the lines as instructions tell you. To do the pretty ribbon effect along the handle, take strong double sided tape and stick to inside of front handle. Then stick your ribbon down to this in a ruffle making sure you leave most of the ribbon showing above the handle.

This paper set not only has great papers it has wonderful sentiments. For friends and loved one's you'll find something you'll want to use.

For more ideas of the papers available in the Creativity Club head over to my 'Docrafts Creativity Club' page :-)

Create some steam....

Steampunk has been sooo popular over the last year. Docrafts have recently released their interpretation of this amazing mix of Victoriana and Industrial Revolution clash. You can find in their new 'Chronology' range:
  • Papers
  • Stamps
  • Metal embellishments
  • Die cut toppers and decoupage
  • Die sets
And, if like me you're a member of the Docrafts Creativity Club you'll have access to their downloads area where you can print off a range of papers to make whatever you like! Have a look at my page link to the Creativity Club.

Using the free stamp that came in the latest Docrafts Creativity Magazine and the download papers - here's the final card...

And here's how to make..

What you'll need:
  • Download papers
  • Free stamp from magazine
  • XCut Postage Stamp nesting dies
  • Docrafts Chronology brads (optional)
  • Docrafts dye ink pads; chocolate, dark orange, dark yellow and black
  • Docrafts pigment dye ink pad; chocolate (for embossing)
  • Black card
  • White card (to stamp on)
  • Papermania 'copper' embossing powder
  • Gold or copper mirror card
  • Brown ribbon
  1. Die cut the largest postage stamp die out of your white card
  2. Stamp up the main image (on your die cut) and clock (x4). You're only going to emboss two of the four clocks.
  3. Once you've stamped and embossed then ink up the images to age them with your ink pads

4. Take thick black card and score in half. Then score left hand section in half again. If you have Docrafts score board then you want to score for half A4.
5. Decorate inside section with text paper, inking edges and roughing them up with your craft knife.
6. Add text paper to left hand panel, inking and distressing as before.
7. Using large text paper, cut panel to fit as a strip on left hand side of card.
8. Using super strong double sided tape, run a strip down the front left panel and stick down your brown ribbon as a ruffle all the way down.
9. Next, cut mirror card panel and add narrower section of patterned paper on top and stick down to inside of card.
10. Take ribbon and cut into small strips, making a banner edge on each. Use your stapler to secure to the card
11. Now for your clocks; Stick them down alternating embossed and stamped down the inside of your card
12. Secure two brads on your main topper before sticking to the card with foam pads.
13. Finish off by cutting the word 'steampunk' out of your backing paper. Trim into a banner and matt onto black card. Secure with foam pads.

TOP TIP: To create the effect you see on this card - open out the left hand panel and have flat on your craft mat. Stick down your topper overlapping your two panel sections. Using your craft knife cut around the topper on the right hand half panel only, leaving a border. When you stand your card up, the topper now has the black matting behind it